Configurations of my hexo blog, now rendering with pandoc and automatic building/publishing with Travis-CI.
Features
- Automatic build by Travis-CI
- Image/equation numbering and reference
- Wiki-Style tooltip reference
hexo-reference, seems not working
Automatic build and publish by Travis-CI
It has been one long-time wish to build and publish blog automatically, may dates from the very first time meeting hexo. See 1, 2, 3, and maybe many more online for references.
For many of them, two branches/repository are used, one for hexo+blog source, the other for publishing. We divide the first one, and the system is like in Fig 1. The main advantage is that the source files are totally independent of hexo.
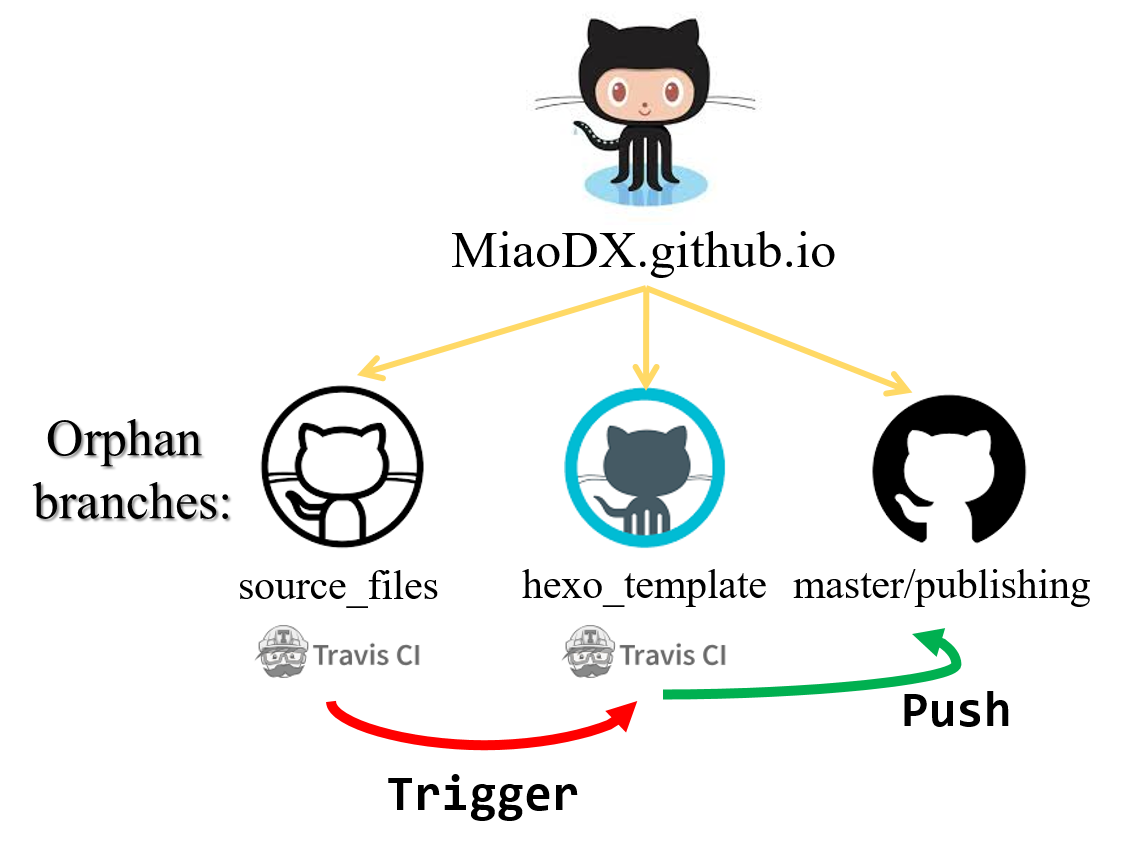
There are three orphan branches in this repository, source_files is all the blog source files and corresponding resources (images in most cases), hexo_template for the hexo configurations, and master for published blog HTML files.
orphan branches serves it well to separate these branches without specific dependencies between each other, as in Fig 1, source_files and hexo_template are both equipped with Travis-ci, the former one just trigger the latter after new commits.
So the majority of jobs are done at hexo_template CI:
- Install necessary libraries,
hexo_cli,pandoc v2.xand pandoc filterspandoc-fignos, pandoc-fignos, etc - NPM installation for
package.json - Get blog source files from
source_filebranch - Get theme files & override the theme configuration
- Duplicate resources/images folder by shell, this is due to the mechanism of hexo for serving images in the same-name folder of markdown files.
- hexo clean, hexo g
- Go to
./publicdirectory,git init/add/commit,git pushtomasterbranch - Done!
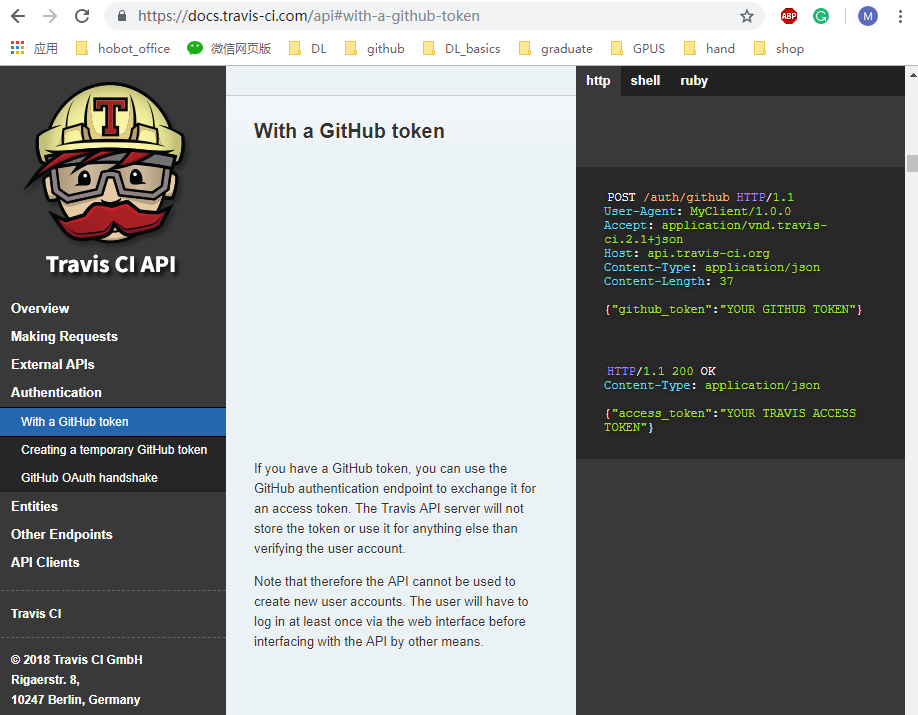
As for the trigger procedure of source_files CI, there are two similar code snippets for this task, see stephanmg/travis-dependent-builds and plume-lib/trigger-travis. The former one only use Github Token (we already have it at the hexo_template pushing part) and login Travis to get the Access Token and do the trigger, the latter one requires Access Token as input, but have smaller processing time.
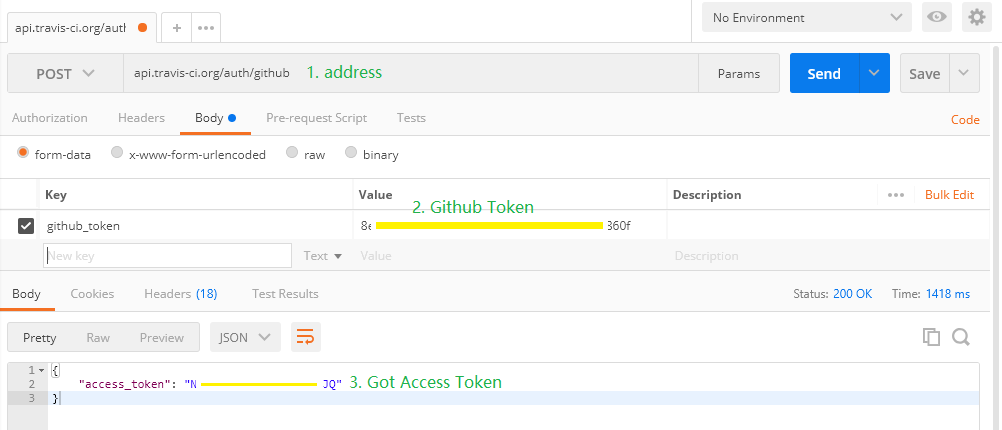
See 4 for the differences between different types of tokens, and as shown in the bottom of it, we can get Access Token with Github Token with HTTP requests (which is neat since we may not have ruby environments at hand) as shown in Fig 2 and send the requests with postman as in Fig 3.
That's it, we have set up the automatic updating blog system.
Pandoc
The default markdown rendering engine is hexo-renderer-marked, however, it performs poorly for images rendering, like specify the image width and numbering for reference, we choose hexo-renderer-pandoc instead.
With pandoc filter pandoc-fignos, we can specify image width and refer to images like:
1 | Please see figure @fig:answer_is_42 for more info. |
Pandoc version
The hexo-renderer-pandoc changed its behavior at version 2.x, as discussed in 5, chances are that we can change some codes by ourselves to make it work, but we choose to install the newer version of pandoc with sudo dpkg -i
Drawbacks & workaround
--- un-support
When rendering files with many --- for dividing line, hexo failed in one way or another.
So change --- to *** and done this forever :(
TODO
- [ ] Compress the contents by
gulpto make the rendering faster?
https://segmentfault.com/a/1190000009054888↩
http://www.yanglangjing.com/2018/08/28/travis_ci_auto_deploy_hexo_to_vps/↩
https://notes.iissnan.com/2016/publishing-github-pages-with-travis-ci/↩
https://blog.travis-ci.com/2013-01-28-token-token-token↩
https://github.com/wzpan/hexo-renderer-pandoc/pull/22↩